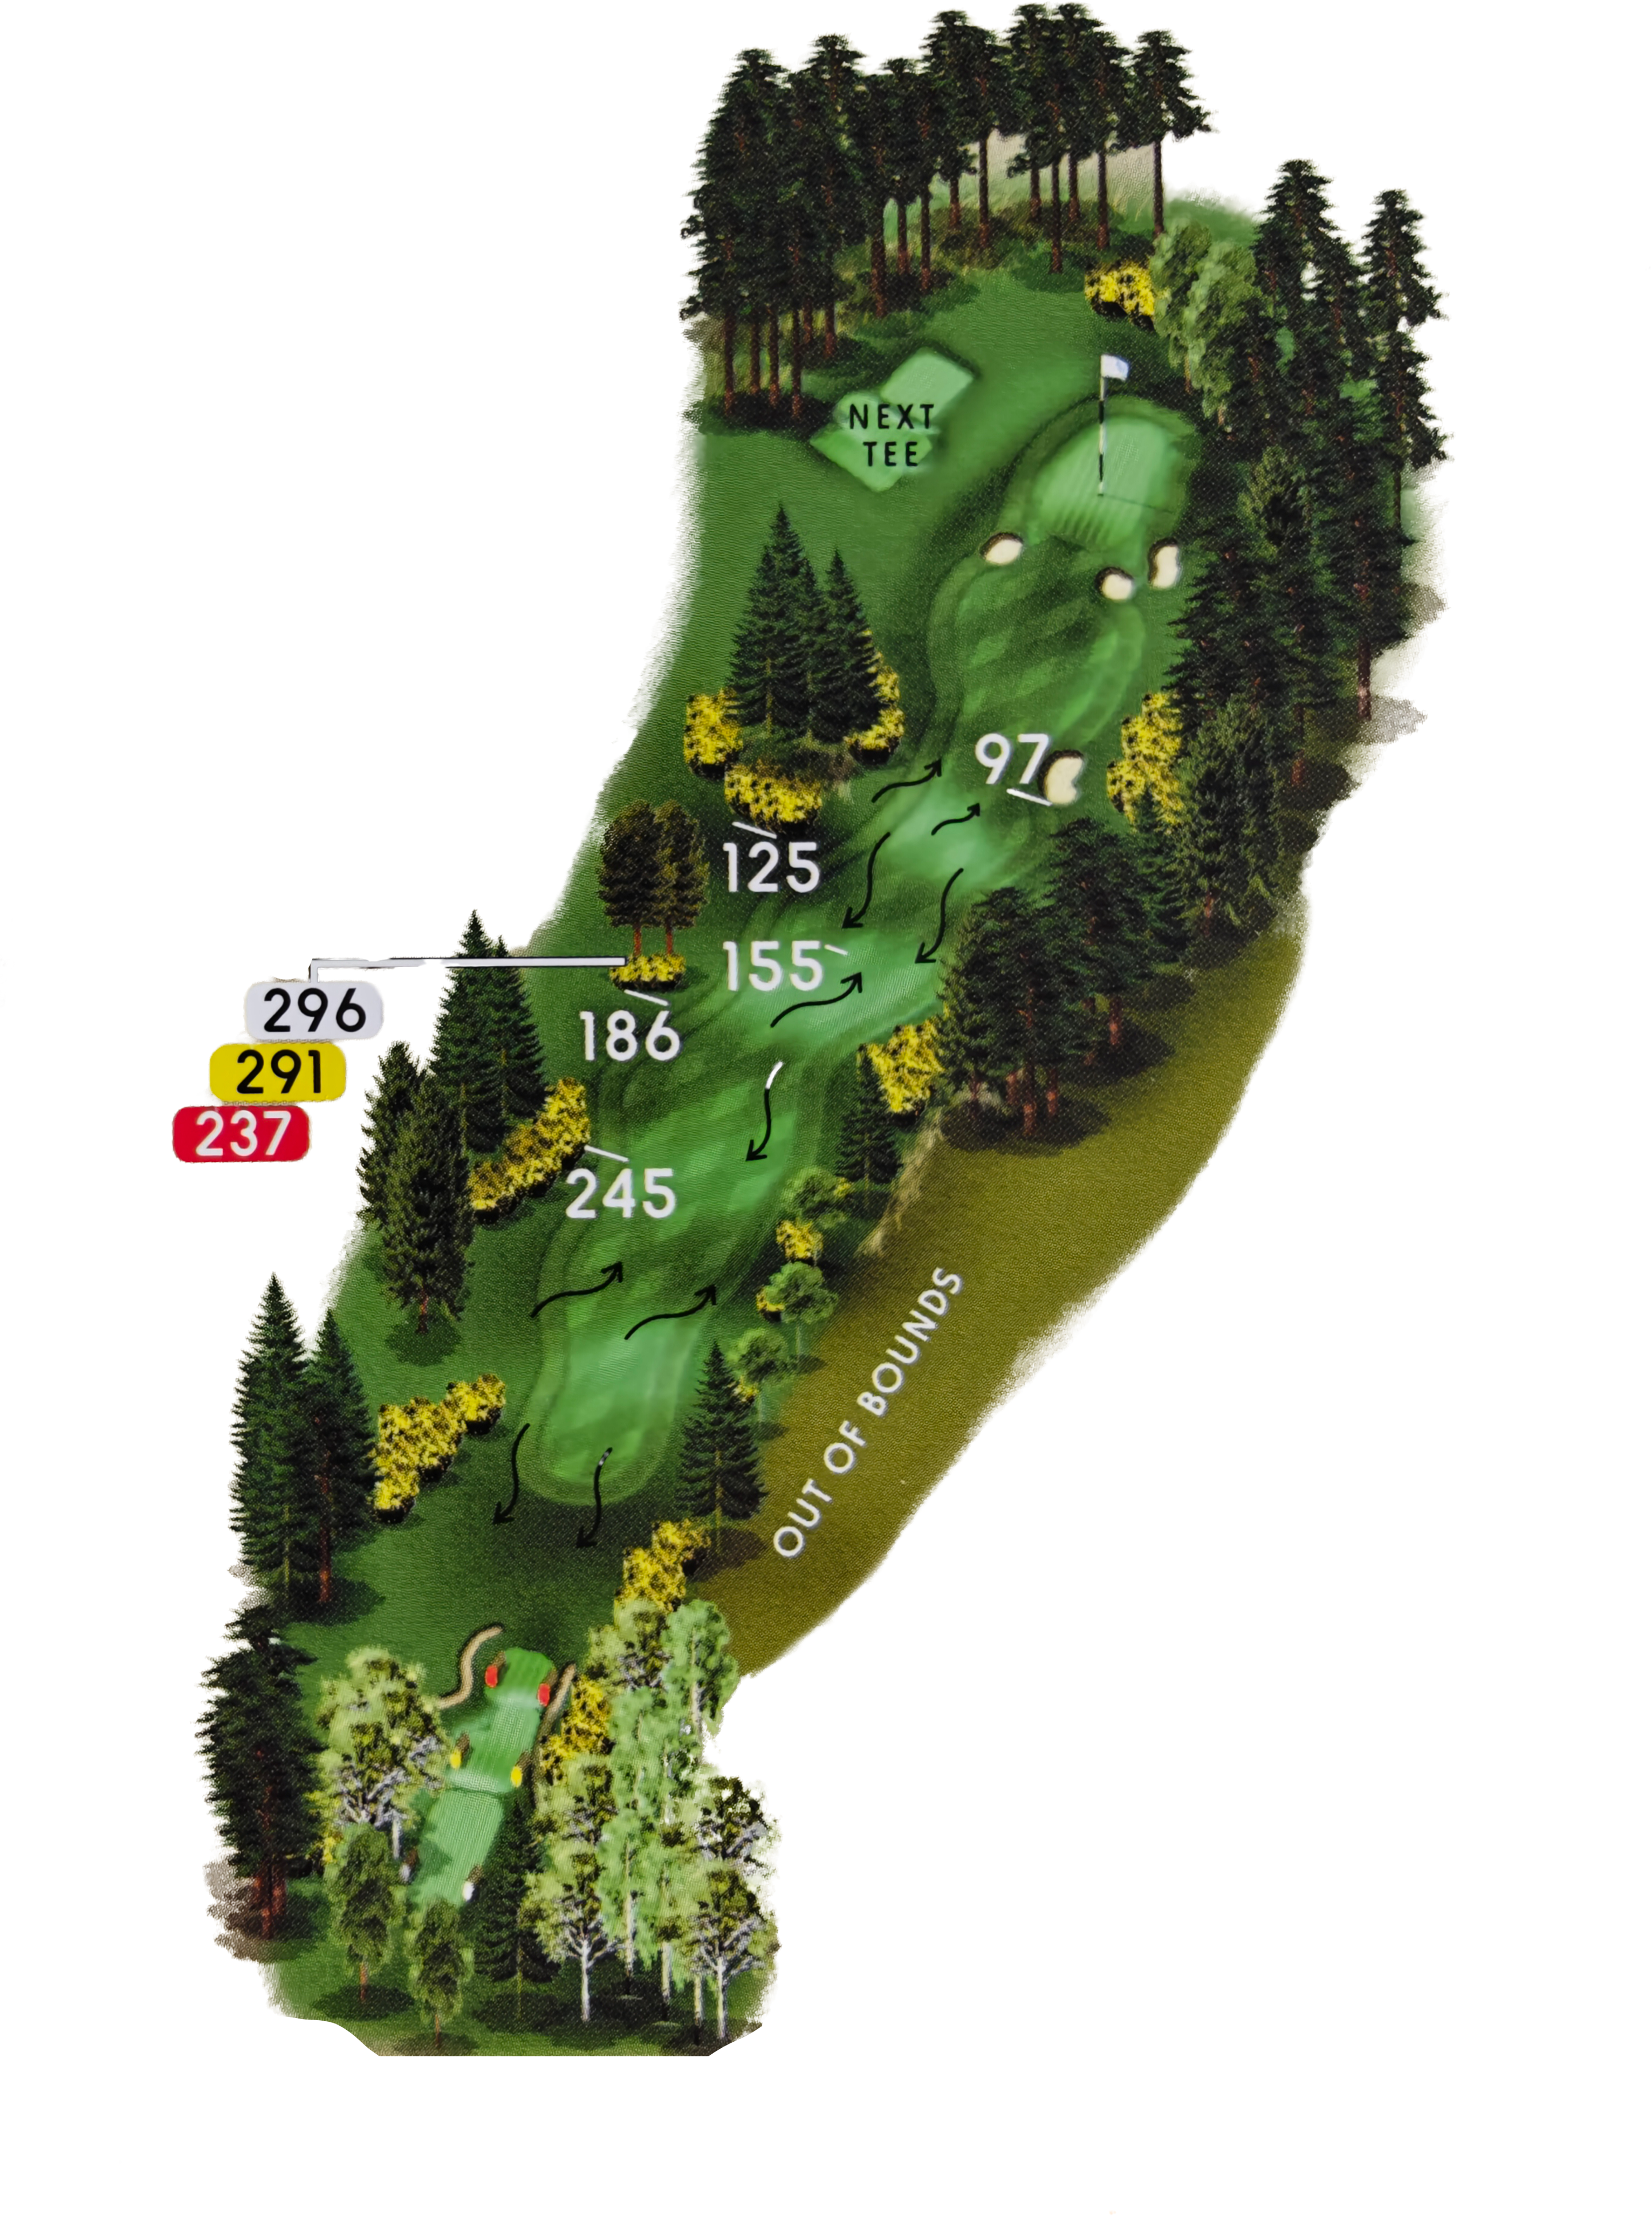
Hole 9 | Majuba
The last of the par 5 holes, like the Muiry and the par 4 Cluny, this has danger all down the right with out of bounds for the first 350 yards. This can be an extra ‘nervy’ tee shot with a prevailing left to right cross wind. However, be careful if you go left too as there are trees and rough all round the 6th and 10th green and 11th tee.
An accurate drive can make this green reachable in 2 for an eagle chance, but for most a sensible lay-up with the second shot sets up a straightforward approach to a green that sits on top of a steep and long incline.
Top tip – In drier times make sure your approach makes it over the false front of the green or you might find your ball racing right back down the hill past you! Don’t over do it though as the steep slope off the back leaves a very nervy chip back towards that false front and a potential re-run starting the sequence all over again from the bottom of Majuba Hill! (With a particularly nasty pin position some have even been known to putt right off the edge!)
|
Tee |
Yards |
Par |
Index |
|
White |
482 |
5 |
4 |
|
Yellow |
477 |
5 |
4 |
|
Red |
423 |
5 |
4 |
Do be a Boer!
The Battle of Majuba Hill (1881) stands as one of the most humbling defeats in British military history — a turning point with lasting consequences.
From what seemed an unassailable position atop the summit, British forces, including regiments from the Gordon Highlanders, were routed by a far smaller Boer force. Poor visibility, panicked command, and wildly inaccurate rifle fire allowed the Boers to advance unseen through long grass, encircle the summit, and pick off British soldiers with devastating precision. Chaos followed, as British troops fled down the slopes — straight into enemy hands.
This defeat not only dented Britain’s military pride but also marked the beginning of a gradual loss of dominance in Africa. Some even cite Majuba as the first crack in the empire’s armour.
So what does this have to do with the 9th at Forres?
Take a look at the green. With its steep slope, false front and elevated plateau, it’s not hard to see why earlier generations — for whom the Boer War was living memory — nicknamed this hole Majuba. Like the British at the battle, if you fall short, you risk tumbling back down into danger.
So take heed: Be a Boer! Conquer the hill, hold your ground, and don’t let your ball retreat down the slope. Victory awaits at the top — humiliation lies below.
Image from Warfare History